


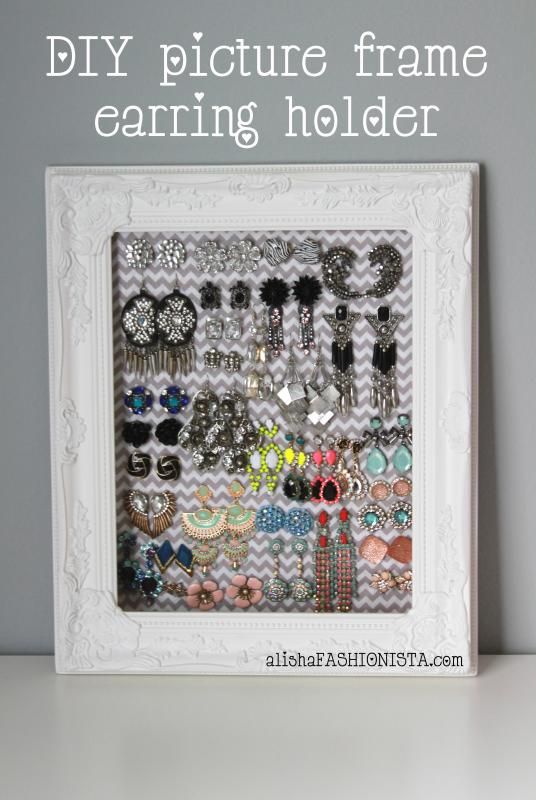
I decided to create a new DIY segment every Fridays called DIY Fridays. I wanted to mix things up a bit and give you all some crafty inspiration. Today I created a earring holder from a picture frame. I created one a while back when I was in NY, but I couldn't bring it over to LA with me. While I'm still waiting for my Jewelry Armoire, I decided to create this same jewelry holder but with colors that will match my apartment. 't was super easy and you can basically use any color combo you like! Let me know in the comments down below what kind of DIY's you would all like to see in the future. Enjoy!
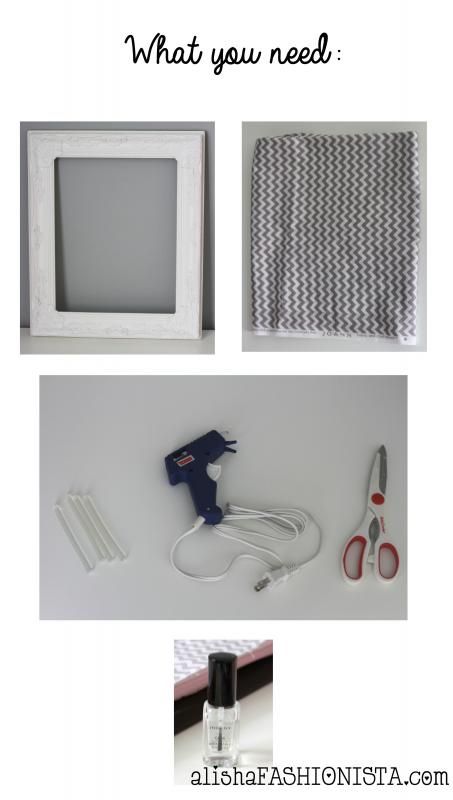


All you need to re-create this Earring Holder is:
11"x14" Picture Frame-Hobby Lobby
1/2 yard of fabric(if the fabric's width is 45 inches, you should get a full yard to be on the safe side)-Joanns Fabrics
Glue Gun and Glue Sticks-Michaels
Scissors-The Dollar Tree
Clear Nail Polish-Inglot(any brand would be fine)
*Optional-Sewing Machine(This is not necessary, but you can use this instead of the glue gun. I will explain more in the steps below)
I got my picture frame at Hobby Lobby. It came without backing and glass cover. You can use a fully functioning picture frame as well. I made my previous earring holder with a full functioning picture frame, I just removed the backing and glass.
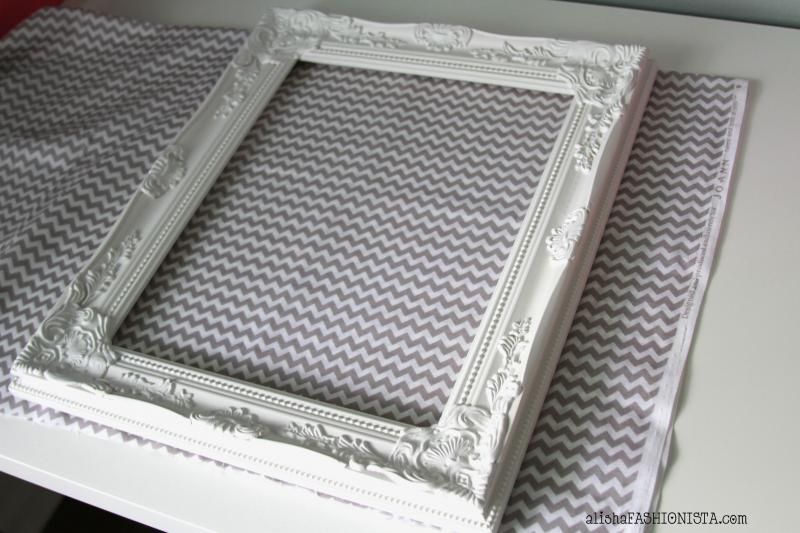
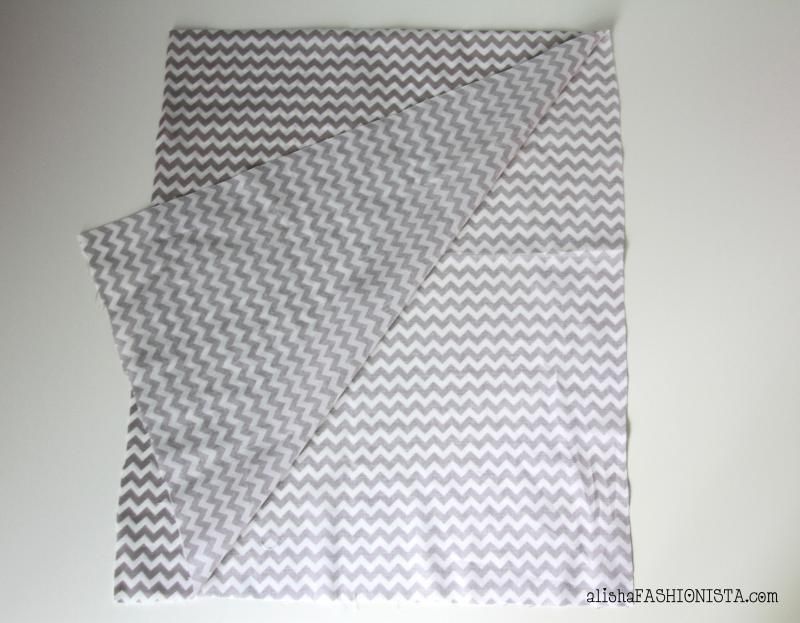
Step 1: Fold Fabric in half and place picture frame on the desired spot of the fabric. If you are using a thicker fabric than you don't half to double the fabric. Doubling the fabric will create more weight, allowing the earrings to hold onto the fabric more securely.
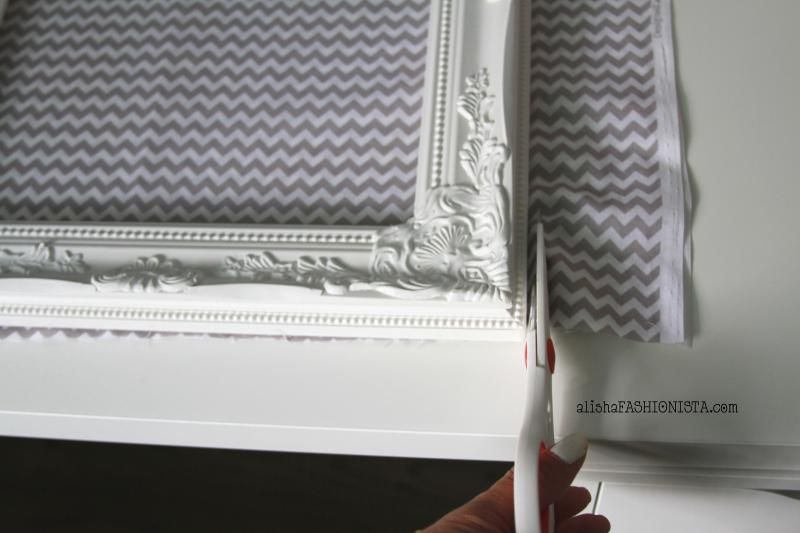
Step 2: Cut the fabric along the picture frame. Use the picture frame as a guide to cut out the exact width needed. After the fabric is cut, remove the picture frame and straighten any jagged edges by re-cutting.
Step 3: Your fabric should look like this. Folded at the top, with the remainder three sides open. Don't worry if the sides are not that straight, it will be behind the picture frame. No one will notice, trust me!
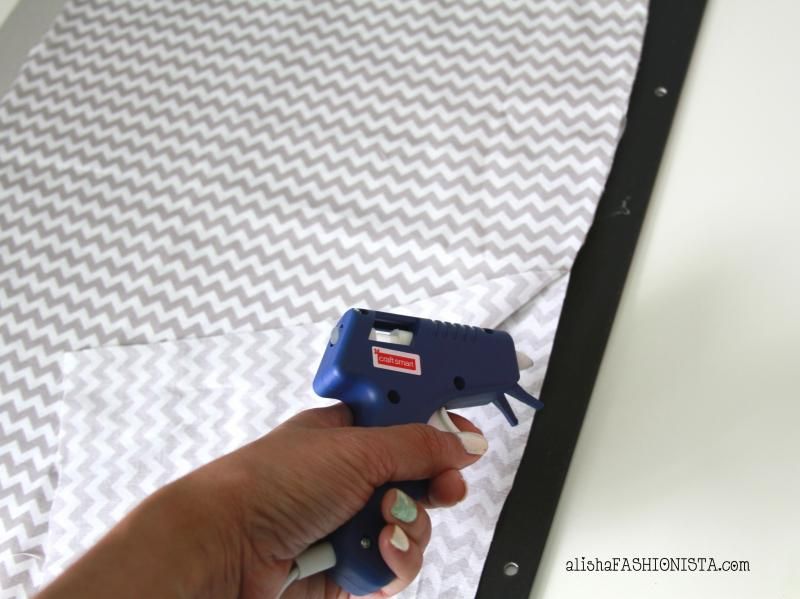
Step 4: Glue the three sides together. Since this step can get very messy, make sure you place the fabric on an old magazine or cardboard (I used the back of my desk calendar). Make sure you use the handle of your scissors to press down the glue to make sure the fabrics are fully sealed. ***Do not use your fingers, the glue is very hot and it will burn you! I learned the hard way.
This is were the optional sewing mating comes in. If you don't want to glue the sides, you an easily sew the sides up! This will also allow you to skip the next step.
Step 5: To prevent unravelling of the fabric, paint your clear nail polish on the sides of the fabric where you just glued.
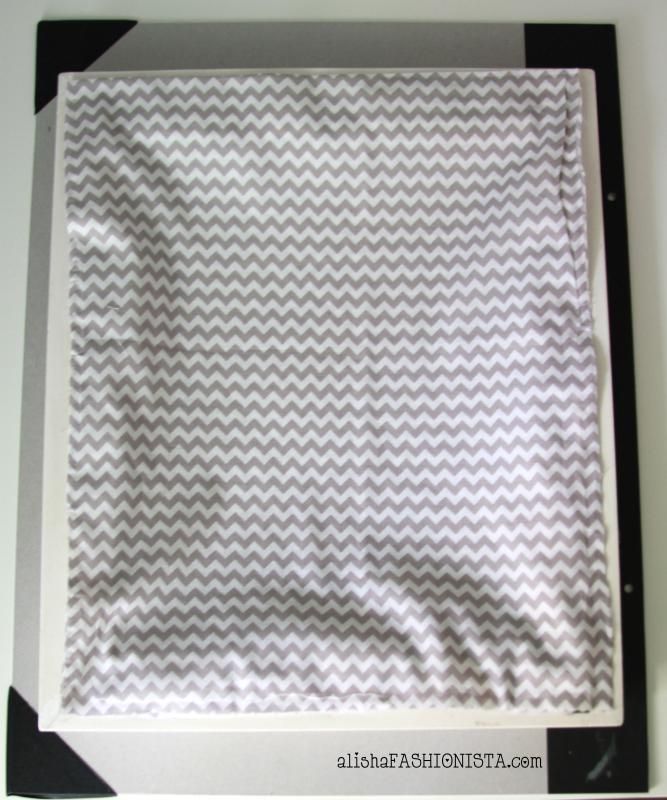
Step 6: After the fabric has dried, lay it on top of the picture frame to make sure everything lays correctly.
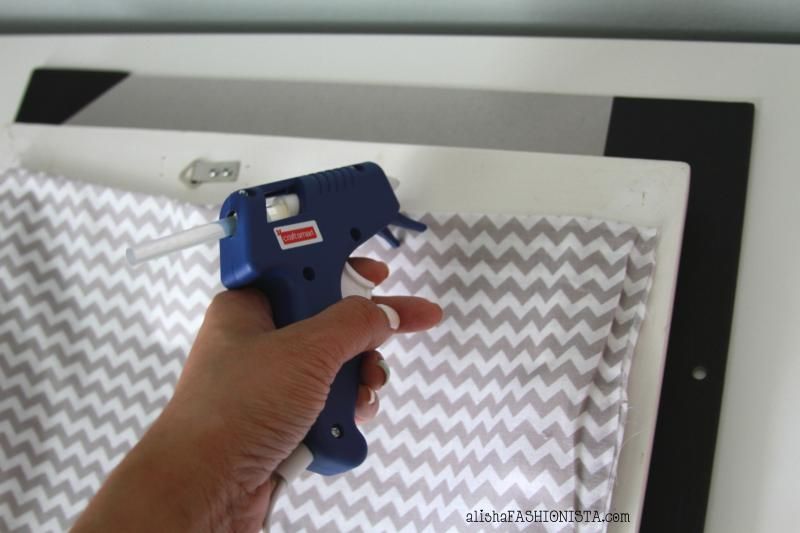
Step 7: Glue the top of the picture frame in whatever direction you want the frame to hang. Remember to glue the top only. This will allow the fabric to swing in and out of the frame, making it easier for you to reach your earrings when its hung on a wall.
TADA! Your done! I would love to see your recreations! Instagram a picture of your earring picture frame holder and hashtag #fashionistaDIY. Don't forget to follow me on Instagram, Twitter, Facebook. I hope everyone has a great weekend!
xo alishaFASHIONISTA
2 comments:
yeaa..Informative article, just what I was looking for. Thanks for this valuable information here.
nice pictures,Excellent post and wonderful blog. i truly impressed.
Post a Comment